A couple of days ago i went to see Breaking Dawn Part 1. I loved it. I watched every movie except Eclipse but i am gonna watch it tomorrow because i own it. I have only read Twilight and i am gonna go bye New Moon. I love this saga/ series. I think that breaking dawn is the best because Bella becomes a vampire at the last second of part 1 and it hooks me so much to go watch part 1. I also liked when Jacob looked at Bella and Edwards baby and felt like there were destined to be together. AND OF COURSE BELLA AND EDWARD GET MARRIED :)

Wednesday, November 30, 2011
Saturday, November 26, 2011
Haven't Been Uploading :)

Hey everyone, for a person who check my blog most of the time, i really haven't been uploading. Its just that this week was very busy for me which i apologize. On Monday i did upload a blog post. On Tuesday i went to NY <3. I came back at night so on Wednesday i uploaded another post. I also promised a bunch of pics from NY and i also need to do a haul. I already took the pic for the haul and i need ti upload that as well as the pics from NY on my laptop :) So i will have a blog post soon...
Thursday, November 24, 2011
How to Decorate Your hair
a must is Feathers or hair extensions. I currently have a green feather in my hair and it just look so prettty and nice and it looks so cute when its in a pony. I also love geting headbands with bows. It just gives you that cutie look. Another thing that is in currently is BIG FLOWER CLIPS. They just look adorable and you can use them for any hairstyle :) Now thinks of something that would look good in your hair. I have also got my hair done a aruba and it beaded and sooo cute :)
Monday, November 21, 2011
12 ways to wear a scarf :)

12 WAYS TO WEAR A SCARF
This is supposes to be self explanatory,
when you guys look at it you should be able to create the design
here's just some background on how to do it
Caution: I may not teach you the exact way :)
1. Take a flary scarf and half it into a triangle and tie it at the back
2. Just first let it drape on your shoulder and then tie a bow at the side
3. Wrap it 2 times lets the side have equal lengths
4. Its just a simple tie in the corner
5. Do the same thing as #3 but since its a different type it will look different
6. Same as #4 but tie it in the middle and pull one side
7. Wrap multiple times and then tie it let one strand lay and tuck one in
8. Same thing as #1 but crinkle it for more volume and let it on the side
9. Same as #1 again but this time let the strands tuck in the triangle part instead of knotting them at the end
10. Wrap it making one side longer than the other
11. Same as #3 but take one strand and go over the loops on your neck
12. This is the same thing as #6 but make on length longer than the other
I;m not going to be here tomorrow, i'm going to New York in the morning and i might not be able to upload anything! I might do it the morning but no promises. I promise that I will have pictures from New York and the statue of liberty !
tell me what you think :)
Sunday, November 20, 2011
Make you own Jewelry Hanger

Haha.. This is late. So i was getting ready for picture day
and this is the only day i actually wear really nice jewelry
and it was all tangled up. I was soo upset! So i was tired of it
so i was determined to make a jewelry hanger
Step 1 - Ok so fist get those cotton hangers like these below 
Step2- Hot clue gun it to the wall or thumb tack it and
hook it on from there
Step3- now all over stick in thumb tack and then hook jewelry on it
Its that easy
Optional -
For earings you can just stick it in but it can bent the hook
of the earing so
honestly thumb tacks are your best
friends on this
another thing you can do is get the cotton thumb tack
but fist stick the necklace on the thumb tack and then
stick it on the hanger so when you want to wear it you must tack out the thumb tack but still they are soo cute

bye bye lovlies :)
Saturday, November 19, 2011
How to Naturally Whiten your teeth !
Its easy all you need is
a banana, couple strawberry, and baking soda
I have 2 recipes for you using the ingredients above so lets get started
So first smash a bunch of strawberries like this, but dont smash a lot
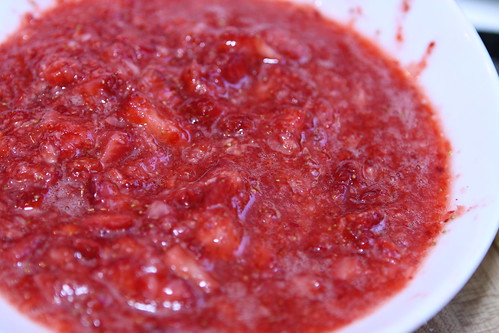 looks gross right, but it helps
Next you are going to add baking soda to this
 add how much need
next your going to take a tooth brush and pretend your mixture is tooth paste
yes it feels a little awkward in your mouth but dont worry it helps a lot. spit the mixture out and take more until you finish the mixture ..
MORE ABOUT THIS...
 Ok once you have your banana separate form the skin.. optional - eat the banana because we will be using the skin :)
 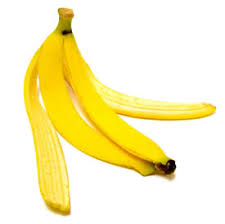 I know this also might sound gross but... do it its gonna really help.. take the inside and rub it on your teeth all over. That it its easy and all you need is a simple banana :)
looks gross right, but it helpsNext you are going to add baking soda to this
next your going to take a tooth brush and pretend your mixture is tooth paste
yes it feels a little awkward in your mouth but dont worry it helps a lot. spit the mixture out and take more until you finish the mixture ..
MORE ABOUT THIS...
It is very important to brush your teeth well after using any strawberry treatment. Strawberries do contain natural sugar, and leaving them on your teeth for long periods of time could cause cavities. And the very ingredient that whitens our teeth, malic acid, can be harmful if left on too long. Any type of acid could eat through our teeth’s enamel, and that also provides ample opportunity for cavities to form.
Due to the strawberry’s acid content, it’s probably a good idea not to use strawberry treatments too often even if you do brush well afterward. Once a week should be sufficient. It’s also important to continue to go to the dentist for regular cleanings.
While it is important to take some precautions when using strawberries and baking soda to whiten teeth, these natural whiteners are less expensive than commercial treatments. The strawberries loosen the hold of the stains on the teeth, while the baking soda buffs the stains away. And best of all, the danger of using chemicals on your teeth is not a concern.
-----------------------------------------------------------------------------------------------------------------------------------
OK next let me show you another recipe with just using a plain banana
so just take a banana and peel it like this
Ok once you have your banana separate form the skin.. optional - eat the banana because we will be using the skin :)More info
Bananas last longer if hung on a banana rack in room temperature.
Drinks like dark sodas, coffee, dark wines, dark tea and of course, smoking all stain the teeth.
The leftover banana peel can be cut up and put in the freezer for using later even though it turns color, it can still be used and the leftover used for compost.
To whiten teeth with banana peel is very safe and healthy for teeth as banana peels are a wonderful source of minerals and vitamins. They do not have the abrasiveness that other natural whiteners have and best of all they are inexpensive.
- ehow:)
- ehow:)
Thank you guys and tell me what you try out and if it works:)
Friday, November 18, 2011
How to look You best in a Picture:)
Yes! I know its a little too late for school pictures..
- Don’t do *full frontal!* No, not the nudity kind, LOL!
 Try a 3/4 pose. If you’re standing, turn slightly and rest your weight on one foot. If you’re sitting, angle slightly to one side or the other. Doing so angles the body, tips the shoulders a little and angles the head just a bit. It adds dimension to your pics and looks more interesting and natural than a straight-ahead pose.
 - Lean slightly toward the camera. It adds interest, dimension and looks natural, too. Think of having a long neck like a giraffe. Tilt your chin down slightly to hide any double chin/s and to block the camera’s view up your nostrils.
- Learn, like Tyra says, to smile with your eyes. Think coy and demure, like a cougar luring her prey to come closer by acting harmless and innocent. Huge ear-to-ear smiles focus attention on your gums and can make you look like you’re squinting.
- Think BAM! Practice a picture pose trigger. Models are taught to change their state of mind in an instant by developing a trigger. When they’re about to have their picture taken, even if they feel like crap, they fire their trigger and BAM! — great photo. One trigger you hear a lot about is called the rear cheek squeeze.
Don’t laugh, but it’s just like it sounds — you squeeze the cheeks of your rear end together and hold them that way for the shot. Try it in your next picture. - Keep looking up! That is, don’t look directly at the lens; look slightly above it. It brightens the eyes in pictures and makes you look more vibrant and alive.
Thursday, November 17, 2011
How to get rid of Split Ends :)

Healthy defined by thick, shiny and bouncing hair without split ends. When most of the feature is accomplished the last one is always at a risk due to one or the other reasons. Read on to know causes and natural home remedies for hair split ends.
Causes
Hair split ends or Trichoptlosis happens when the hair's protective cuticle is stripped away from the ends of hair fiber. It happens when the natural oils from the scalp fail to reach the ends or when cortex loses moisture and the hair begins to unravel like a rope. Other reasons are
;
Causes
Hair split ends or Trichoptlosis happens when the hair's protective cuticle is stripped away from the ends of hair fiber. It happens when the natural oils from the scalp fail to reach the ends or when cortex loses moisture and the hair begins to unravel like a rope. Other reasons are
;
- dry scalp
- Exposure to extreme temperature and chemical products like relaxers and hair colour.
- Lack of nourishment.
- Excessive dying
- Vigorous brushing and backcombing. Use of metallic combs and brushes
- Brushing hair when it is still wet.
- Use of uncovered elastic bands on the hair.
- Use of satin pillows.
- Repeated use of heated appliances like iron or hair blow dryers
once the hair is split the only cure is to trim. So, trim your hair with the help of these guidelines.
- Sit near a natural light source may be near the window or outdoors in the yard to see the split ends properly.
- Take a small section of hair and twist them in a downward motion. This will make the split ends to stick out automatically.
- Use a sharp scissor to snip off the split ends. Make sure you cut the damaged cuticles only. This will also enhance a natural layered effect with a thick bounce.
Home remedies to avoid split ends
;
- Mix well 1 teaspoon of castor oil, mustard oil and olive oil. Massage the scalp for atleast 30mins and apply it to the full length of hair. Cover the head with a hot towel later.
- Mix 1tspn of almond oil with 1 egg yolk and apply it to your scalp as well as hair. Wash it after ' an hour.
- Hair moisturizers are made of mashed up avocado when applied to damp hair will prevent split ends effectively. Make sure you leave it on your hair for atleast 15-30 minutes. You can also add hot olive oil to it.
- If it is hard to get avocado then use mayonnaise in its place. Apply it once a week.
- Shampoo your hair after every workout or strenuous exercise, as due to perspiration the salt will erode your hair.
- Apply regular conditioner after every wash and deep conditioner once a month.
Wednesday, November 16, 2011
Breaking Bad Beauty Habits

We all have bad beauty habits, or your flawless
Well what habits are primary to actually ditch
here are the TOP 10 :)
So what do you think :)
Tuesday, November 15, 2011
DIY: Marble Your nails
 I should really call this manicure “An Afternoon of Frustration” because that’s how trying to create a water marble manicure left me feeling; FRUSTRATED! Those of you who have mastered the technique, I bow down to you. I honestly have no desire to try this ever again but since I made the effort, I thought I’d share my experience with you. I should really call this manicure “An Afternoon of Frustration” because that’s how trying to create a water marble manicure left me feeling; FRUSTRATED! Those of you who have mastered the technique, I bow down to you. I honestly have no desire to try this ever again but since I made the effort, I thought I’d share my experience with you.I mean its easy to do but i just leaves me annoyed. I don't know why but its one of my Favorite trick that makes you nails look like pro:) Find out more about the water marble technique and my adventure trying to recreate the look after the jump! |
The basic steps of the water marbling process sound easy enough; drop polish in water, create a pattern with a toothpick, dip nail, clean off excess. Simple right? Here’s what you need to get started:
- Cup of room temperature water (filtered or distilled is preferable to tap)
- Toothpick or orange wood stick
- Cuticle oil
- 2-4 bottles of nail polish
STEP 1: Start with your nails painted and dry. Use a base color that will contrast the polishes you are using to create the marble effect. I chose to use a light base color, the minty green OPI Damone Roberts 1968.
The main issue with water marbling is that you are dipping your fingers into a pool of polish and it gets all over your skin and cuticle. You can take the time to clean it all off but I found a couple great tips on YouTube. CND’s Kristina Baune Estabrooks suggests covering your skin with cuticle oil to prevent the polish from sticking to your skin and SimpleLittlePleasures uses tape to create a polish barrier. I chose to go the cuticle oil route. My skin can always benefit from some extra moisturizing.
STEP 2: Apply cuticle oil to your skin and cuticles all the way down to the top knuckle and don’t forget the underside of your nail.

STEP 3: Drop polish onto the surface of the water from about a half an inch away so the polish will disperse. Continue adding drops in alternating colors to create rings of color. Add drops until you achieve the depth of color you desire.
Tip: Not all polish will work well with water marbling so you have to test a few to see which ones disperse the best. I tried OPI Suzi Says Feng Shui and it sank to the bottom of the cup. After a little experimenting I ended up with Sally Hansen Emerald City and China Glaze 5 Golden Rings.
STEP 4: Use a toothpick or orange wood stick to create a pattern in the polish. I’ve seen some people start from the outside but doing that just pulled all the polish into a clump so I started in the middle and worked from there. Again, you have to play to find the method that works best for you. Continue to swirl the polish until you create a pattern you like. If you mess up, just start over.
Tip: To clean the water surface, add one drop of polish and spread it over the surface pulling the color to the edges with your stick. Let it dry for a few seconds and then “clean” the surface by removing the layer of polish with your stick. It will pull up any floating bits of polish in the process. I picked up that trick fromSimpleLittlePleasures.

STEP 5: Dip your nail in the polish right after you finish creating your pattern. If you wait too long the polish will dry. While the nail is submerged, use your stick to pull the excess polish away from your skin. Remove nail from water and shake off excess moisture.

STEP 6: Clean up the cuticle and skin. Thanks to the cuticle oil, the majority of the polish will easily come off using a cotton pad. I used a clean orange wood stick to push the polish off my cuticles, no remover needed. For stubborn bits of polish dip a cotton swab in acetone.
The Finished Product

- While the cuticle oil helps with cleanup, it was still a major pain removing up all that excess polish. I went through so many cotton pads and ended up getting polish on my other fingers. I seriously don’t know how people do a full manicure on all 10 nails without losing their shit!
- Trying to draw a pattern that looks good is not easy and as you can tell, I did NOT succeed at it for the most part.
- It’s very easy to accidentally pull the pattern or ding it during cleanup and being a naturally clumsy person, I biffed two nails and had to start over. I even made mistakes on the finished manicure but couldn’t bother to try again.
Now before you call me out for whining, I know that any new skill takes time and practice and I’m sure that the process becomes easier the more you do it. Though in all honesty, with the amount of waste I created just marbling three nails, I have no desire to master this art. I’ll be content with admiring the YouTubers from now on.
I’d love to hear your thoughts on water marble manicures. Who’s tried it? Do you love it? Hate it? Do you have any tips to share?
soure - below :)
Subscribe to:
Posts (Atom)